Sunday, December 11, 2011

Christmas and Holidays How-To DIY Tutorials Decor


Now that I am done with my very last academic class EVER, I am taking a little breather before getting into dissertation-writing mode, and eager to do some home decorating for the holidays!

I love finding so much inspiration from just googling and surfing around the internet. Here's just some of the fun ideas on how to make an upcycled tree ornament, holiday card display, holiday embroidery hoop, advent calendar, seasonal wreath, and a new spin on the paper snowflake!

I am a big fan of upcycled items, its so exciting to bring new life into something! Here is a great idea from www.bhg.com about how to turn a sweater into a cute knitted tree ornament!

Martha Stewart is also the queen of all things crafty, I think this is such a great idea to display all the holiday cards you get each year with this DIY holiday card tree display .  All the other organizing tips in her post are helpful too, e.g., storing some small ornaments in an egg carton, using a hanging funnel to help make using twine and yarn easier, etc.  Here are some of her holiday organizing tips.


Here is a fun idea and new spin on how to use an embroidery hoop to make a seasonal holiday hoop or holiday ornament.  I love all the fun colors! DIY holidays embroidery hoops


I love this idea for an advent calendar in bystephanielynn 's blog where each day, as we get closer to Christmas day, she moves each ornament from the frame and onto the tree.  Here is her advent calendar how-to


I have also been on the hunt for fun ideas on how to make my own holiday wreath...I came across this great blogpost about how to make a fun yarn wreath that is great for making wreaths for any occasion, not just the Christmas holiday season, great idea!  Here is the detailed tutorial by MomsAdvice on making a yarn wreath.

 Usually I read www.boston.com to find out about the latest news in my area, but stumbled upon this lil post about how to make a 3-D snowflake that looks really cool to try out.   Even www.wikihow.com has a how-to tutorial as well.

Happy Crafting!


Sunday, December 4, 2011

Holiday Handmade Gallery - Artists Crossing in Downtown Crossing Boston


Consider shopping local and supporting handmade this holiday season!  One of the galleries where you can find some of our work (from MaJenta Designs as well as other special items not currently listed in our Etsy shop):

 Artists Crossing: 505 Washington St, Boston, MA (Map it)
Downtown Crossing 
(across from Eddie Bauer, between Macys and The Opera House)
Open EVERY day!
Sunday through Wednesday 11 am to 5 pm
Thursday through Saturday 11 am to 7 pm

 
Here is the lovely wall display with all my necklaces, purse hooks, night lights, gift tins, bottle openers, and pocket mirrors 


Close up of some of my pendant necklaces and gift tins


Close up of some of the lovely night lights that look great on or off!  


 Here I am with all my Japanese-inspired creations of MaJenta Designs

  Four of my fellow Boston Handmade members are currently featured! 

  
Up on the walls are mixed media canvases by Reclaimed to You
 
Handsawed sterling silver jewelry by Nancyrosetta

Original millinery designs and an assortment of hats by Elephunk's Trunk

  Metalsmith fine jewelry by Cristina Hurley Jewelry Designs


There are a total of 20 artists featured this month, come check out all the lovely artwork and handmade creations!


Monday, November 28, 2011

Crafting with Photos Workshop


Recently, I got to participate in a fun workshop led by Boston Handmade member, Lucie Wicker, where she taught us how to make various items using photos! 


 It was loads of fun where we learned how to make magnets, canvases, and ornaments! It was just a great time to gather and be creative together!


One of my finished canvases! A picture of us in Korea's Damyang bamboo forest.
This photo was taken by Kerry Hawkins of Kerry Hawkins Photography

Tuesday, November 15, 2011

How-to: Thanksgiving centerpiece idea - Cornhusk Flowers


I just love autumnal decor, and with Thanksgiving around the corner, I was on the look out for centerpieces that would be festive and fitting for the big Thanksgiving dinner gathering.  I stumbled upon this clever idea on marthastewart.com on how to make Cornhusk flowers! You can click the links to see all the steps, or I have copy/pasted them below. 

For Cosmos and Daisies:
  • Printable template
  • Card stock (for templates)
  • Dried cornhusks (available at crafts stores and Mexican food shops)
  • Paper towels
  • Scissors
  • Pinking shears
  • Wire, 18- and 32-gauge
  • Dried corn kernels
  • Butter knife
  • Clear varnish
  • White glue
  • Tweezers
  • Brown floral tape
For Sunflowers:
  • Printable template
  • Card stock (for base and templates)
  • Dried corn kernels
  • Hot-glue gun
  • Tweezers
  • Cornhusks
  • Scissors
  • Wire, 18-gauge
  • Wooden dowel, 1/4-inch diameter
  • White floral tape

Read more at Marthastewart.com: Cornhusk Flowers - Martha Stewart Crafts

Step 1

Prepare Cornhusks

For all flowers, soak cornhusks in water for 2 to 3 minutes; blot dry with paper towels. For petals and other shapes, copy template onto card stock. Cut out and place template on slightly damp husk, and then cut shapes. Using your fingers, cup and shape petals while they dry. To make pink husks, soak purple and off-white cornhusks together in a bowl of water overnight. Blot dry with paper towels before using.

Step 2

Make Cosmos and Daisies

These delicate blossoms can be any color and can have either fringed or corn-kernel centers. To make multiple petals, fold a still-damp cornhusk accordion-style, place petal template on top, and cut out, making sure the grain runs vertically. Edge the top of each cosmos petal individually with pinking shears (see finished cosmos petals in step 4). Form stamen by rolling inner strip tightly, and wrap twice with end of wire; roll outer strip around that, and wrap wire again. Make a single center for cosmos, a double for daisies. Fasten with 3-foot length of 32-gauge wire. Attach petals to stamen, wrapping twice with wire each time.


Step 3

Make Flower Centers and Stem

For corn-kernel flower centers, pry kernels from the cob with a butter knife. Seal kernels with clear varnish spray before using to discourage weevils. Make an unfringed stamen, folding center rectangle in half lengthwise (for daisies, use only inner center), rolling tightly, and fastening with wire. Using white glue, affix several kernels to center after attaching petals (a pair of tweezers is helpful for handling kernels). Insert a length of 18-gauge wire into base of stamen; trim to desired stem length, and finish by wrapping with floral tape.


Step 4

Arrange Finished Cosmos and Daisies

Place finished cosmos and daisies in a vase to create a seasonal arrangement.


Step 5

Make Sunflowers

For each sunflower, cut a 4-inch square of heavy red or orange card stock. Use tweezers to pick up a kernel of corn, dab with hot glue, and attach to center of card stock. Repeat, arranging glued kernels in pattern indicated in photo. Continue to add rows of kernels until the flower center is desired size, between 2 and 3 inches across; cut out. Next, cut out 45 to 50 petals in desired size (use small-petal template for 2-inch center; use large petal for 3-inch center), using accordion-fold technique. Hot-glue the petals, one at a time, onto the back of the center disk, making 3 staggered rows so petals overlap.


Step 6

Attach the Stem

Cut a 10-inch length of 18-gauge wire and bend in half, forming a 1-inch loop at top. Bend wire gently just below loop to make flower's neck. Attach the wire to the end of a 1/4-inch-diameter wooden dowel, about 3 inches from the loop, and secure with white floral tape. Hot-glue the loop to back of flower disk. Cut out 15 to 20 calyx petals, using accordion-fold technique.

Step 7

Make Calyx

Hot-glue calyx petals to back of disk, one at a time, in staggered rows, covering entire back from edge of flower to top of dowel. Trim dowel to desired stem length. Cut 1-inch-wide strips of cornhusk. Wrap stem with strips: Hot-glue one end to top of dowel, where calyx petals end, wrap, and hot-glue at other end. Repeat until stem is covered.


Step 8

Arrange Finished Sunflowers

Place finished sunflowers in a vase to create a seasonal arrangement.

All images and directions are from marthastewart.com 
Read more at Marthastewart.com: Cornhusk Flowers - Martha Stewart Crafts

Monday, November 14, 2011

Holiday Handmade Gallery - Canton, MA


If you are in the Canton, Stoughton, Norwood, etc. vicinity, make sure to check out
Cristina Hurley Gallery

Location:  3 Rockland St. Canton MA 02021

Gallery hours: Wednesday through Saturday, 11am-6pm


You can find lots of handmade gifts for the holidays, including fine jewelry, cozy scarves, pottery, and more! 

You can also find several of our Asian-inspired pendant necklaces and portable purse hooks too!  


Thursday, November 10, 2011

How-To: Thanksgiving decor ideas


 With Thanksgiving coming up around the corner, I have been on the lookout for festive autumnal handmade centerpiece & decor ideas.  Here are a few fun ideas I found, click the links to read their How-to instructions.


"Cornhusk flowers" by Martha Stewart 
I love the idea of incorporating indian corn in a new inventive way. 

I just love candles, and autumn colors would definitely make the Thanksgiving table more festive.  These would also look great on a fire mantle or on your entrance table.


A different twist for if you like a more subtle colored centerpiece. I love how you add the  small votive candle to the top, making this a functional centerpiece as well. 
This looks like such a fun idea for the family to come together and think up ideas to then incorporate into placemats - they seem like they'd make great discussion pieces! I like the idea of writing things like what you are  "thankful for."

Thursday, October 27, 2011

Apple Picking & Apple Cooking Adventures!


As mentioned in my previous post I have lived in New England all my life, yet often I get caught up in the hustle and bustle of life that I dont make as much time as I would prefer to soak in and enjoy the changing seasons and what makes New England so special.  Thus, this year I have made an effort to do more seasonal activities as well as another goal to also learn to cook more.  I hope to share in my adventures of both New Englandy fun as well as my meager attempts to learn to cook!  I'm no foodie, but I'm happy to share some of the things I have enjoyed and liked along the way!

Autumn is my favorite season, with the crispy cool air, red-orange-yellow foliage, the crunch of fallen leaves, and apple and pumpkin flavored goodies (e.g., pumpkin spice latte, cider donuts, caramel apples, etc), mmmm.  The other weekend we decided to go apple-picking for a triple couples date outing. 
 The bag got so heavy by the end, we needed teamwork to carry the 20+lb bag back to the car.


We also planned a 3-course meal, making 5 dishs, all using apples! We made some classic apple dishes (e.g., apple crisp) as well as unique dishes including apples (e.g., curried eggs and apple). 

Our dishes included:
1. Salad: cranberry/grape, apple, and nut salad
2. Appetizer/Entree: curried eggs & apple
3. Entree: sweet potato & apple gratin
4. Entree: pork chops with golden apple sauce
5. Dessert: apple crisp

Prepping the "curried eggs and apples" dish


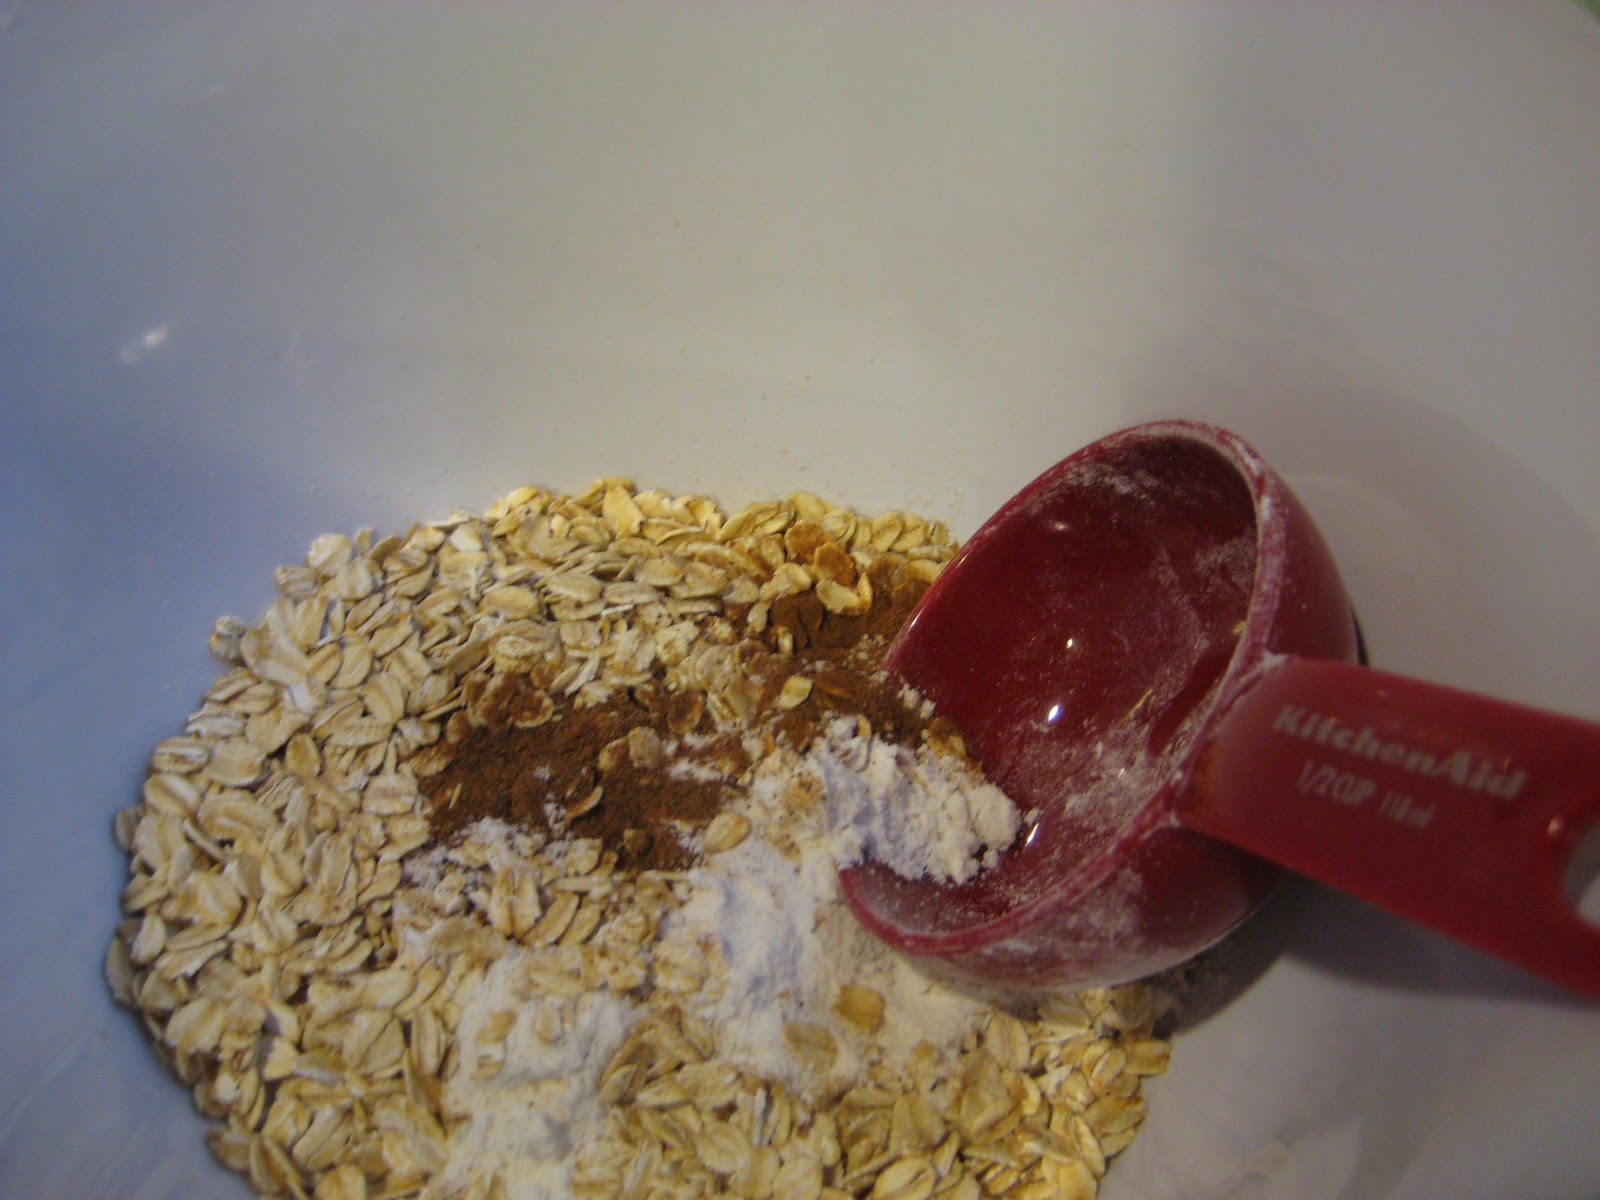
Mixing up the oats to put into our apple crisp

 Braising the apples for the golden apple topping for the porkchops


 Stirring up the topping for our salad, with apples, green onions, and pistachios mixed in a light lime dijon dressing mixture

 Layering up the sweet potato & apple gratin 

Final products!

Close up of some of the finished dishes!


All the dishes were delicious, but my favorite was the pork chops dish.  We used the simple Rachel Ray recipe below:

Pork Chops with Golden Apple Sauce

Ingredients
  • 4 Golden Delicious apples, chopped
  • 2 teaspoons lemon juice
  • 2 ounces golden raisins, a handful
  • 1-inch piece fresh ginger root
  • 3 tablespoons light brown sugar
  • 2 cups all natural apple juice or cider, plus a splash for pan sauce
  • 1/2 teaspoon ground cinnamon
  • 1/4 teaspoon freshly grated nutmeg
  • 2 tablespoons vegetable oil or olive oil, 2 turns of the pan
  • 4 (1-inch) thick center cut boneless pork loin chops, 6 to 8 ounces each
  • Salt and pepper
  • 2 tablespoons butter
Directions
Combine first 8 ingredients in a medium pot placed over medium high heat and cook until a chunky sauce forms, 10 to 12 minutes, stirring occasionally. If sauce begins to spatter as it bubbles, reduce heat back a little, but it should be allowed to reduce and form quickly. Once apples are soft and sauce forms, remove it from the heat.
Heat a large nonstick skillet over medium high heat. Add oil to the pan. Season chops on 1 side with salt and pepper. Using a pair of tongs, add chops to hot skillet seasoned side down. Season the opposite side of the chops with salt and pepper. Brown and caramelize the chops 2 minutes on each side, then reduce heat to medium and cook another 5 to 6 minutes, turning occasionally, until juices run clear. Remove chops from heat and let them rest a couple of minutes for juice to redistribute. Deglaze the pan with a splash of apple juice and 2 tablespoons of butter. Pour pan sauce over chops. Remove ginger from the sauce and top chops with generous portions of warm golden apple sauce.